Lanair Products, LLC
-
Spark/Ignition Test
Lanair MX-Series Preheater Ignition Test
In this video we will discuss how to test the ignition system on a lanair mx-series waste-oil heater. We’ll cover troubleshooting the spark of the ignitor transformer as well as common issues with the burner electrode.
If your heating unit will power up and spray fuel from the nozzle, but won’t establish a flame, this video should help.
It’s important to follow safety guidelines when working on mechanical, plumbing, and electrical equipment. Only allow qualified technicians to work on your system and ensure that the appropriate personal protective equipment and safe practices are used throughout the work.
Tools and equipment:
- Safety Goggles
- Insulated Gloves, You will also need insulated gloves to protect against both heat and electrical shock
- Flathead Screwdriver with insulated handle
- Inspection Mirror
- 1/2 inch Wrench
- Phillips-head screwdriver
Step One
An important step in preparing to test the ignition system of a Lanair heater is to remove the compressed-air supply to the burner. This will prevent any fuel from being sprayed into the chamber while testing. Be sure to leave the compressed-air supply disconnected from the burner throughout the testing process.
Step Two
In order to test the burner ignition system, a simulated “flame signal” must be present on the primary control’s flame-sensor circuit.
To do this, disconnect the flame sensor wires from the primary control and use terminal connectors and an alligator clip, or a short piece of wire to bridge the connection during the burner’s startup sequence. Leave the flame-sensor terminals unbridged until the startup sequence begins.
Step Three
Establish a call for heat to the unit by setting the thermostat to its maximum temperature setting. If the red light on the burner ’s primary control is indicating that the unit is locked out, you will need to press the reset button on the top of primary control to reset the burner. The unit should now attempt to start operating.
A few seconds after the burner begins its startup sequence , bridge the flame-sensor terminals to simulate to the primary control that a flame has been established. The unit should now continue to operate until the bridge or the call for heat is removed.
Never bridge the flame sensor terminals for any purpose other than service and testing, as critical safety features for normal operation are defeated when the burner is in this condition. Never leave the unit unattended, even during service, while the flame sensor terminals are bridged.
Step Four
With the burner now running in ignition-test mode, use a gloved hand to open the view port on the furnace cabinet.
Observe the interior of the combustion chamber. No fuel should be spraying from the burner. Use a flashlight to confirm, if necessary. If fuel is entering the combustion chamber, contact Lanair for technical assistance.
Step Five
Insert the inspection mirror into the view port and observe the electrode tips near the nozzle of the burner.
A strong, consistent, blue-white spark should be visible at the electrode. The spark should look like a small flame blowing into the combustion chamber.
Additional Troubleshooting
If the spark appears to be correct, but the unit will still not establish a flame when returned to normal operation, the ignition system is not likely to be the cause of the issue and additional troubleshooting should be conducted.
Consult the installation and operation manual for your model.
If spark is bridging to the nozzle or spinner head, adjust the burner until the spark is contained to the electrode.
If the spark is present but not blowing into the combustion chamber, move on to troubleshooting the burner motor.
If the spark is inconsistent or not present, the electrode or transformer could be defective and may need replacement.
To isolate the issue, move on to testing the ignition transformer inside the burner.
Step Six
Take extra caution during the next few steps, as high voltage electricity will be present.
Step Seven
Using the Phillips-head screwdriver, remove the large Phillips-head screw securing the burner cover closed.
Step Eight
To open the burner lid, pull it towards you along the slotted hinge, lift the lid to a 90 (ninety) degree angle, then let it slide downward to remain fixed in the open position.
Step Nine
Using the insulated gloves and insulated screwdriver, contact the metal tip of the screwdriver to one of the transformer terminal posts and begin to slide the screwdriver tip toward the other terminal post. Take care not to contact the screwdriver to anything other than the transformer terminal posts.
Step Ten
When the gap between the screwdriver tip and the second terminal post reaches approximately ½ (one half) inch, a strong, consistent, blue-white spark should be visible arcing between the metal surfaces.
Step Eleven
If the spark appears to be correct, but the spark at the electrode did not appear to be correct, ensure that the transformer lead springs make contact with the electrode tines when the burner lid is in the closed position. If the lead spring do not make contact with the electrode, turn the power off the unit and adjust the lead springs to the proper position.
Step Twelve
After these adjustments are made, restore power to the unit and resume testing.
If the transformer is functioning correctly and the lead springs make contact with the electrode when the burner lid is in the closed position, but spark at is not correct, the electrode is defective and should be replaced.
If the spark at both the transformer and electrode appears to be correct, but the unit will still not establish a flame when returned to normal operation, the ignition system is not likely to be the cause of the issue. Contact Lanair technical support to continue troubleshooting.
If the spark at the transformer is weak, inconsistent, or not present, the ignition transformer is defective and should be replaced.
Turn the power off to the unit and contact Lanair by phone or at lanair-dot-com for assistance.
Replace any defective parts and perform this test again.
Step Thirteen
When the ignition system is working properly throughout this test, restore the unit’s installation, settings, and safety features to their operational conditions and reattempt to operate the unit. If the ignition system is functioning properly, but the unit is still not functioning correctly when returned to normal operation, continue troubleshooting by referring to the product manual or call Lanair technical support for further assistance. We hope this video was helpful in servicing your Lanair Waste-Oil Heater …and getting you back to enjoying America’s best value in heating!
REPLACEMENT ELECTRODE IGNITOR ASSEMBLY PART# 3728
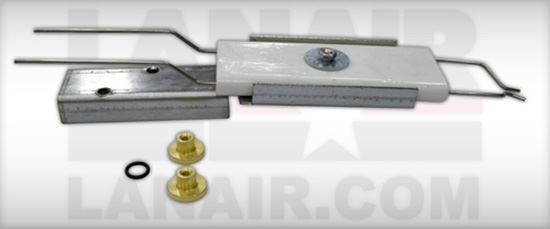
Product Page:
https://www.lanair.com/3728-kit-ignitor-one-piece
AND REPLACEMENT ELECTRONIC IGNITOR / TRANSFORMER PART#9600
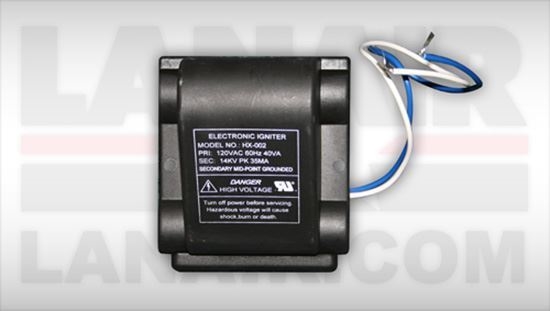
Product Page:
https://www.lanair.com/9600-transformer-8020-w-kit-9105
For Additional help contact our parts and service department at: 888-370-6531 or service@lanair.com


